- Home
- News

Press Release
October 15, 2014
MiCAT Planner - Automatic Measurement Program Generation Software
One-click Programming that Changes the Relationship between People and Precision Measurement
 Mitutoyo Corporation (Headquarters: Takatsu-ku, Kawasaki City, Kanagawa Prefecture; President: Toru Nakagawa) developed Japan’s first XY-measuring machine in 1986, and since then has continued to lead the way in the manufacture and sale of coordinate measuring machines. In addition to the machines, it has earned international praise for the development and sale of dedicated high-performance coordinate measuring machine software that meets the needs of users.
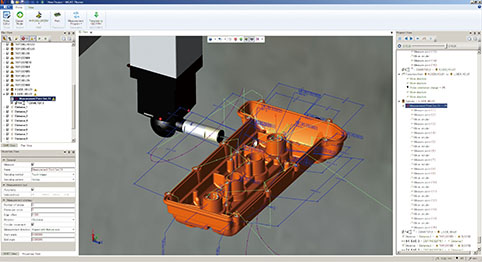
Over recent years, the measurement business has seen considerable need for measurement programming. Major factors behind this trend are the increasing importance of quality control, the growing diversity of things being measured and reduced product lifecycles. Many issues have accompanied this change, including more man-hours being spent on programming work, differences in worker-created measurement programs, and inefficient programs being created due to proficiency problems. To solve these issues, Mitutoyo focused on the move from design drawings to 3D annotated models, and then developed the MiCAT Planner, which is software that uses 3D CAD and Product Manufacturing Information (PMI) to enable one-click automated generation of measurement programs. Compared to using general-purpose software to generate measurement programs, using MiCAT Planner enables programming time to be reduced by up to 95% and enables a significant increase in the efficiency of measurement work.
Mitutoyo makes a social contribution by providing precision measurement for the continual evolution of manufacturing.
Key Features
| 1. | Automated program generation function Software identifies tolerance information included in 3D models with Product Manufacturing Information, defines the location for measurement, and creates a measurement program fully automatically. |
| 2. | Optimization function Software estimates the shortest route for measurement with the minimum number of probe re-positionings and tool changes, thereby creating a program that enables measurement in the shortest possible time. |
| 3. | Rule editor function Utilizing the rule editor function to set the measurement rules prevents variation in measurement quality between program writers. |
| 4. | Tolerance information addition function Enables software-based addition of tolerance information for 3D models without Product Manufacturing Information. |
Key Specifications
• Input of CAD data
• Read-in of CMM system structural information defined in MCOSMOS
• Creation and editing of measurement rules
• Addition of GD&T (tolerance information) to CAD data
• Setting of parameters (for drive speed, measuring speed, obstacle checks, etc.)
• Powerful 3D view for confirming measurement points and measurement paths
• Automatic measurement program generation
• Conversion to part program for MCOSMOS
