- Home
- News

Press Release
October 27, 2014
New QUICK IMAGE Series 2-D Vision Measuring Systems Launched
New One-click Measurement Function

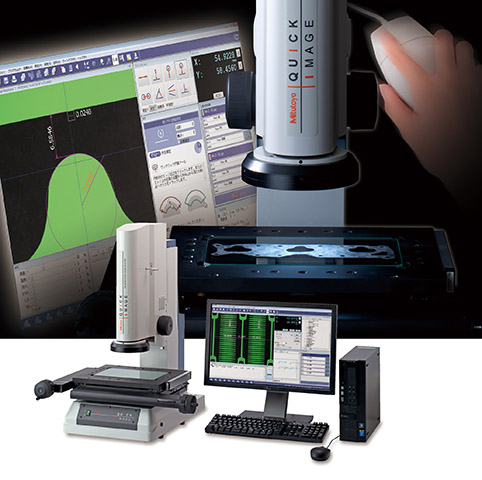
Mitutoyo Corporation (Headquarters: Takatsu-ku, Kawasaki City, Kanagawa Prefecture; President: Toru Nakagawa) has been selling the highly versatile Quick Image series 2-D vision measuring system since 2002. Two new systems with one-click measuring functionality, and further improved ease-of-use and operability, have now been added to the series. Mitutoyo will exhibit the systems at JIMTOF2014, the 27th Japanese International Machine Tool Fair, from October 30, and will be located at Booth No. W3021, West Hall 3, at Tokyo Big Sight.
Quick Image enables measurement of stepped workpieces through widefield batch measurement capabilities and a large focal depth, and captures sharp images with a color camera. A new one-click measurement function has now been added to enable measurement and tolerance judgment with a single click after placing the workpiece. Measurement results are displayed in real time directly on the image, which enables tolerance judgments to be seen at a glance. Now also with improved measurement accuracy within the screen and improved E1xy measurement accuracy, Quick Image ensures class-leading quality and security. All high-luminance built-in LED lighting, 3-megapixel camera and other changes enable observation and measurement using even higher resolution images.
Mitutoyo makes a social contribution by providing precision measurement for the continual evolution of manufacturing.
New Features
|
1. |
One-click measurement function |
|
2. |
Easy Mode for operation by beginners |
|
3. |
Window display function |
|
4. |
Class-leading measurement accuracy assured |
|
5. |
Megapixel color camera |
Key Features
|
1. |
Easy measurement of 3-D workpieces with telecentric optical system |
|
2. |
Switch between large-focal-depth mode (Normal) and high-resolution mode (High Resolution) |
|
3. |
Wide field, rapid batch measurement and high-accuracy measurement |
|
4. |
A choice of illumination systems |
|
5. |
Rich lineup of stages |
|
6. |
Replacement for visual inspection using projector overlay charts |
Key Specifications
|
|
QI-A |
QI-B |
||||
|
View field |
32 x 24 mm |
12.8 x 9.6 mm |
||||
|
Measurement mode |
Large-focal-depth mode |
High-resolution mode |
Large-focal-depth mode |
High-resolution mode |
||
|
Range (X/Y axes) |
Five stages of different sizes 100 x 100 mm, 200 x 100 mm, 200 x 170 mm, 300 x 170 mm, 400 x 200 mm |
|||||
|
Range (Z axis) |
100 mm |
|||||
|
Accuracy*1 |
Measurement accuracy within the screen |
±4 µm |
±2 µm |
±3 µm |
±1.5 µm |
|
|
Repeatability within the screen (±2σ) |
±2 µm |
±1 µm |
±1 µm |
±0.7 µm |
||
|
Measurement accuracy (E1xy) |
±(3.5+0.02L) µm L: arbitrary measuring length (mm) |
|||||
|
Imaging device |
3 MP, 1/2” color camera |
|||||
|
Optical system |
Magnification (telecentric optical system) |
0.2X |
0.5X |
|||
|
Working distance |
90 mm |
|||||
|
Depth of focus |
±11 mm |
±0.6 mm |
±1.8 mm |
±0.6 mm |
||
|
Illumination system |
Transmitted light: Green LED telecentric illumination; Reflected light: White LED; Ring light: Quadrant white LED |
|||||
|
Accuracy guaranteed temperature |
20±1 °C |
|||||
